
This is an alternative tutorial to answer Daniel on his question in Yahoo regarding on how to insert the Java Scripts for JQuery News Ticker. Though what he wants is the "advance" Ticker, I just wanna show him how to insert it the easiest way. Well that's my objective, to teach the easiest way possible.
1. Before proceeding please read: BASIC GUIDE.
2. From the script source found at the demo page, I downloaded the JS and CSS file. Instead of uploading the files to my template I simply copy its content and edit to be be applicable in Weebly. You can always open and edit a CSS file using notepad. The following code is now the combination of the JavaScript and CSS which you will insert to the <head>. (Read editing <head> here).
<script src='http://ajax.googleapis.com/ajax/libs/jquery/1/jquery.min.js' type='text/javascript'></script>
<script language='JavaScript'>
$(function(){
$("ul#ticker01").liScroll();
});
/*!
* liScroll 1.0
* Examples and documentation at:
* http://www.gcmingati.net/wordpress/wp-content/lab/jquery/newsticker/jq-liscroll/scrollanimate.html
* 2007-2010 Gian Carlo Mingati
* Version: 1.0.2.1 (22-APRIL-2011)
* Dual licensed under the MIT and GPL licenses:
* http://www.opensource.org/licenses/mit-license.php
* http://www.gnu.org/licenses/gpl.html
* Requires:
* jQuery v1.2.x or later
*
*/
jQuery.fn.liScroll = function(settings) {
settings = jQuery.extend({
travelocity: 0.10
}, settings);
return this.each(function(){
var $strip = jQuery(this);
$strip.addClass("newsticker")
var stripWidth = 1;
$strip.find("li").each(function(i){
stripWidth += jQuery(this, i).outerWidth(true); // thanks to Michael Haszprunar and Fabien Volpi
});
var $mask = $strip.wrap("<div class='mask'></div>");
var $tickercontainer = $strip.parent().wrap("<div class='tickercontainer'></div>");
var containerWidth = $strip.parent().parent().width(); //a.k.a. 'mask' width
$strip.width(stripWidth);
var totalTravel = stripWidth+containerWidth;
var defTiming = totalTravel/settings.travelocity; // thanks to Scott Waye
function scrollnews(spazio, tempo){
$strip.animate({left: '-='+ spazio}, tempo, "linear", function(){$strip.css("left", containerWidth); scrollnews(totalTravel, defTiming);});
}
scrollnews(totalTravel, defTiming);
$strip.hover(function(){
jQuery(this).stop();
},
function(){
var offset = jQuery(this).offset();
var residualSpace = offset.left + stripWidth;
var residualTime = residualSpace/settings.travelocity;
scrollnews(residualSpace, residualTime);
});
});
};
</script>
<style>
/* liScroll styles */
.tickercontainer { /* the outer div with the black border */
border: 1px solid #000;
background: #fff;
width: 500px;
height: 27px;
margin: auto 0;
padding: 0;
overflow: hidden;
}
.tickercontainer .mask { /* that serves as a mask. so you get a sort of padding both left and right */
position: relative;
left: 10px;
top: 8px;
width: 500px;
overflow: hidden;
}
ul.newsticker { /* that's your list */
position: relative;
left: 500px;
font: bold 10px Verdana;
list-style-type: none;
margin: 0;
padding: 0;
}
ul.newsticker li {
float: left; /* important: display inline gives incorrect results when you check for elem's width */
margin: 0;
padding: 0;
background: #fff;
}
ul.newsticker a {
white-space: nowrap;
padding: 0;
color: #ff0000;
font: bold 10px Verdana;
margin: 0 50px 0 0;
}
ul.newsticker span {
margin: 0 10px 0 0;
}
</style>
The JavaScript is enclosed with <script> and </script> while the CSS with <style> and </style>.
Save it.
3. Now go to the page you want to insert this ticker. Drag an embed code and paste the following:
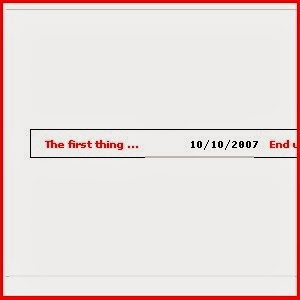
<ul id="ticker01">
<li><span>10/10/2007</span><a href="#">The first thing ...</a></li>
<li><span>10/10/2007</span><a href="#">End up doing is ...</a></li>
<li><span>10/10/2007</span><a href="#">The code that you ...</a></li>
<!-- eccetera -->
</ul>
<li><span>10/10/2007</span><a href="#">The first thing ...</a></li>
<li><span>10/10/2007</span><a href="#">End up doing is ...</a></li>
<li><span>10/10/2007</span><a href="#">The code that you ...</a></li>
<!-- eccetera -->
</ul>
The code above has three lines of sentences. Just make changes on your own. Please refer to the demo.
4. Going back to the code on step 2, there's a description on each short tags. The colors in red are the most important things to change and not to forget to change the speed by reducing or increasing the travelocity. You can always experiment to suit with your site.
That's it and you're done. If you want more clarification please comment below!


0 comments: